

Building a home is easier to understand when you break it into a clear sequence. From planning and permits to finishes and final inspection, the stages of home construction follow a practical order that helps crews work safely and efficiently. This guide explains how a house is built, what happens at each stage, and what homeowners should pay attention to before moving in.
This guide follows the construction itself, stage by stage. If you are still planning, start with our custom home building process overview, and if you are starting with land, see how to build a home on your land.
Quick answer
- The 12 steps: plan, permit, prepare the site, foundation, framing, roofing and windows, rough-ins, inspections and insulation, drywall, exterior and trim, finishes, final punch list
- Why order matters: each stage depends on the one before it, so late changes get expensive
- Fewer surprises: keep a written scope, photograph rough-ins before walls close and hold a contingency
- Before move-in: complete a punch list, final inspections and occupancy approval
Planning to build? Explore Copper communities or browse homes ready now.
What is the process of building a house?
The process of building a house is the organized path from idea to finished home: plan the project, prepare the land, create the structure, install the systems, finish the interior and exterior, then inspect everything before occupancy. While every project is different, most house construction steps follow the same broad rhythm because one stage depends on the one before it. Good planning matters because changes become more expensive once framing, plumbing, electrical, and finishes are already underway.
If you have asked, “how can I build a house without feeling overwhelmed?” the best answer is to treat the project as a series of decisions, not one giant task. You do not need to know every technical detail yourself, but you do need a reliable team, a realistic budget, a written scope, and a clear understanding of the step by step home building process.
Step 1: Start with planning, budget, and design
Before any equipment arrives on site, the project begins with decisions. You need to define the size of the home, the layout, the number of rooms, the style, the must-have features, and the amount you can comfortably spend. This early stage shapes every later decision, so it deserves patience.
A designer, architect, builder, or draftsperson may help turn your ideas into buildable plans. Those plans usually include floor plans, elevations, structural details, window and door schedules, and specifications for materials. This is also the time to consider energy efficiency, storage, future accessibility, outdoor living, and how the home will function day to day.
A useful planning checklist includes:
- A realistic total budget, including contingency funds
- A clear list of needs versus wants
- A selected building lot or land purchase plan
- Preliminary floor plan and exterior style
- Local zoning, setback, and utility requirements
- Financing approval or funding plan
- A builder selection process and written agreement
Step 2: Secure permits
Permits confirm that the proposed home meets local building rules, zoning requirements, and safety standards. The exact approvals vary by location, but they often involve building, electrical, plumbing, mechanical, septic, driveway, or environmental permits. Starting work without the right approvals can cause delays, fines, redesigns, or problems when you try to sell the home later.
Building codes and inspections are set locally, and many jurisdictions adopt model codes published by the International Code Council. Your building department confirms which edition and inspections apply.
Step 3: Prepare the site
Once permits are in place, site preparation begins. Crews clear vegetation, remove debris, mark the building footprint, create access for equipment, and establish temporary utilities if needed. If the lot slopes, holds water, or has poor soil, grading and drainage planning become especially important.
This stage may not look dramatic, but it sets up everything that follows. A well-prepared site helps protect the foundation, keeps water moving away from the home, and gives trades a safer place to work.
Step 4: Build the foundation
The foundation carries the weight of the home and transfers it safely into the ground. Depending on the design and site conditions, the home may use a slab, crawl space, full basement, piers, or another foundation system. Footings are typically formed and poured first, followed by foundation walls or slab preparation.
Before concrete is placed, crews may install reinforcing steel, vapor barriers, drainage components, plumbing sleeves, and other items that need to be embedded or pass through the foundation. Inspections often happen during this phase because hidden foundation details are difficult to verify later.
After the concrete cures, waterproofing, drain tile, backfilling, and rough grading may follow. The goal is not only to support the structure but also to manage moisture, one of the biggest long-term threats to a home.
Step 5: Frame the structure
Framing is the stage where the home suddenly begins to look like a house. Crews build the floors, walls, roof structure, and openings for windows and doors. The frame defines room sizes, ceiling heights, rooflines, stair locations, and the overall shape of the building.
This is one of the most visible stages of building a house, but it is also one of the most technical. Walls must be aligned, openings must match the plans, structural beams must be correctly placed, and the roof system must be properly supported. Small mistakes here can affect cabinets, finishes, doors, windows, and even mechanical systems later.
Once framing is complete, sheathing, house wrap, roof underlayment, and temporary weather protection help dry in the structure. “Dried in” generally means the home is protected enough for interior trades to begin working with less exposure to rain and weather.
Step 6: Install roofing, windows, and exterior doors
After framing, the home needs its main weather barriers. Roofing materials are installed to shed water, while windows and exterior doors are set into the framed openings. Flashing details around these openings are especially important because they help direct water away from vulnerable joints.
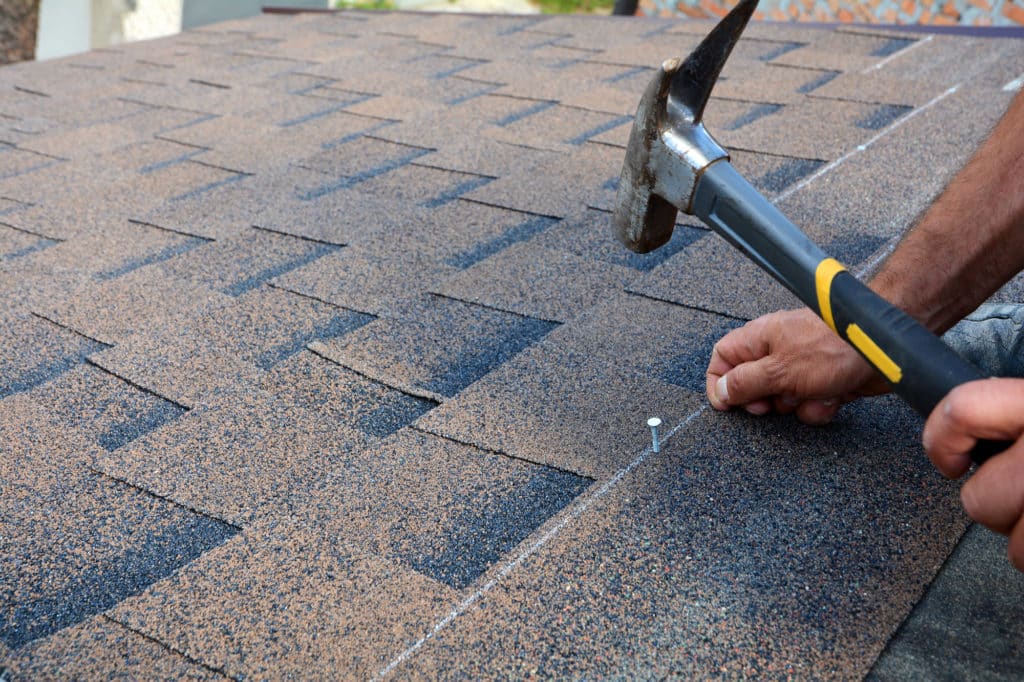
This stage protects the investment already made in lumber, sheathing, and interior space. It also allows the project to move toward mechanical, electrical, and plumbing rough-ins. The house is not finished yet, but it is becoming enclosed and more secure.
Homeowners should avoid choosing exterior products based only on appearance. Durability, maintenance, climate suitability, warranty terms, and installation quality all matter. A beautiful window or roof can still perform poorly if it is not detailed correctly.
Step 7: Rough in plumbing, electrical, and mechanical systems
Rough-in work places the hidden systems inside walls, floors, ceilings, and mechanical spaces before insulation and drywall cover them. Plumbers install supply lines, drain lines, vents, tubs, and shower valves. Electricians run wiring for outlets, lighting, switches, appliances, panels, smoke alarms, and low-voltage needs. HVAC crews install ductwork, vents, equipment lines, exhausts, and related components.
This stage is a key part of stage by stage house building because it determines how comfortable and functional the home will be. It is much easier to add an outlet, shift a light, or adjust a fixture location before the walls are closed.
Walk through the home during rough-in if your builder allows it. Think about furniture placement, kitchen workflow, bathroom convenience, internet needs, outdoor lighting, and future upgrades. Practical choices now can prevent daily frustrations later.
Step 8: Complete inspections, insulation, and air sealing
Before insulation goes in, local inspectors often review framing, plumbing, electrical, and mechanical rough-ins. These inspections help confirm that critical work meets code before it is hidden. If corrections are required, crews address them before moving forward.
Insulation and air sealing then improve comfort, energy performance, and sound control. Depending on the design, insulation may be installed in walls, ceilings, floors, attic spaces, basements, or crawl spaces. Air sealing targets gaps around penetrations, framing joints, exterior walls, and other leakage points.
The practical benefit is simple: a better-sealed, properly insulated home can feel more comfortable and may require less effort from heating and cooling systems. This is one of the less glamorous stages of home construction, but it has a major effect on everyday living.
Step 9: Hang drywall and begin interior surfaces
Drywall changes the feel of the project quickly. Rooms become defined, hallways feel real, and the home starts to look livable. Crews hang panels, tape seams, apply joint compound, sand surfaces, and prepare walls and ceilings for paint or texture.
This phase can feel slow because drying and sanding take time. Rushing it can lead to visible seams, uneven surfaces, or finish flaws that remain noticeable after painting. Clean jobsite conditions also become more important as finished surfaces begin to appear.
Once drywall is ready, interior painting or priming often begins. From this point forward, the project shifts from hidden construction to visible finish work, where craftsmanship and coordination are easy to see.
Step 10: Install exterior finishes and interior trim
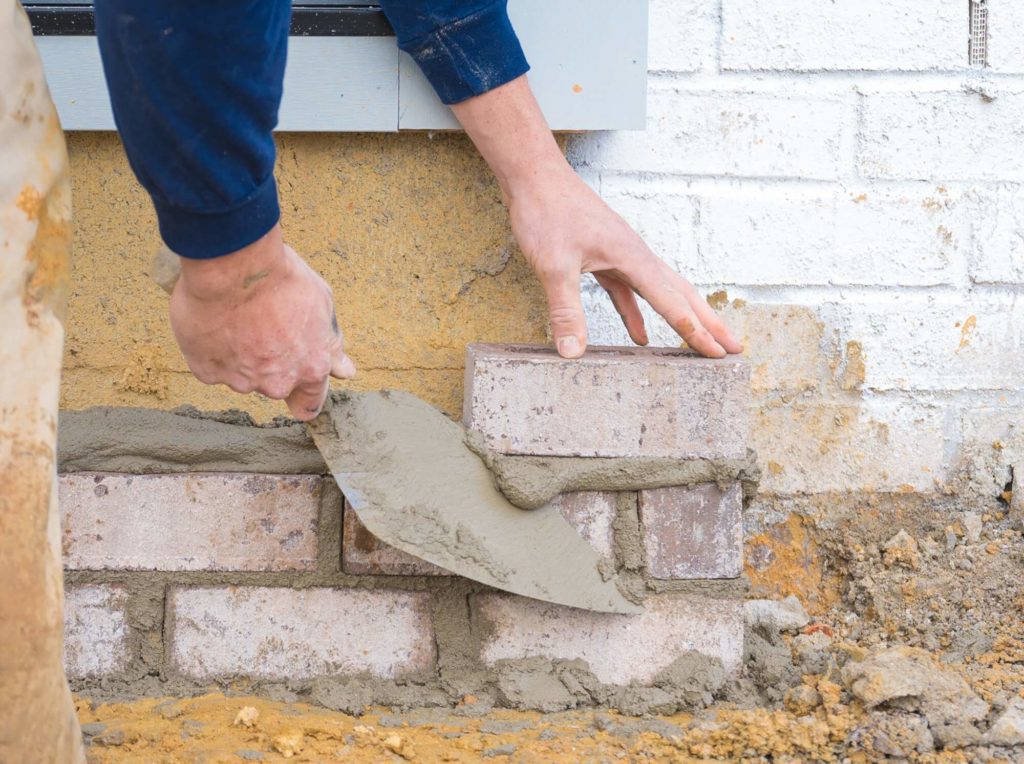
Exterior siding, masonry, stucco, fascia, soffits, gutters, porches, and decks may be completed during this period, depending on weather and scheduling. These elements protect the home, create curb appeal, and complete the exterior envelope. Proper drainage and flashing remain important because exterior finishes must manage water, not trap it.
Inside, trim work begins to sharpen the home’s character. Interior doors, baseboards, window casing, crown molding, stair parts, shelving, and built-ins may be installed. Trim may seem decorative, but it also hides transitions between materials and gives rooms a finished look.
This is where design choices start to feel personal. Profiles, colors, door styles, and hardware all influence whether the home feels simple, traditional, modern, warm, or formal.
Step 11: Add cabinets, fixtures, flooring, and finishes
Finish installation includes many of the items homeowners are most excited to see: cabinets, countertops, tile, flooring, plumbing fixtures, light fixtures, appliances, mirrors, closet systems, and hardware. These are the visible results of months of planning.
This stage requires careful sequencing. Floors may need protection before appliances arrive. Countertops may require templating after cabinets are installed. Tile needs layout planning, curing time, grout, and sealing where appropriate. Each trade depends on another trade finishing correctly.
To reduce stress, make selections early and keep records of model numbers, colors, finishes, and approved substitutions. Delayed decisions can interrupt the schedule, especially when products have long lead times or require custom sizing.
How can I build a house with fewer surprises?
You can reduce surprises by documenting decisions, asking questions early, keeping a contingency budget, and reviewing each stage before the next one covers it. No construction project is perfectly predictable, but clear communication makes problems easier to solve. The most successful homeowners stay engaged without trying to manage every trade directly.
Use this simple control list throughout the project:
- Confirm what is included in the contract and what is an upgrade.
- Keep written approvals for changes, costs, and schedule impacts.
- Visit at agreed times rather than interrupting active work.
- Photograph rough-ins before walls are closed.
- Track selections, delivery dates, and backordered items.
- Ask for clarification when something does not match the plans.
- Save manuals, warranties, paint colors, and finish records.
These habits do not replace professional project management, but they help you stay informed. They also make it easier to understand the stages of building a house as they happen in real time.
Step 12: Complete final systems, punch list, and inspection
Near the end, crews complete final electrical, plumbing, HVAC, appliance, and hardware installation. Switch plates go on, faucets are connected, toilets are set, vents are adjusted, thermostats are installed, and systems are tested. Exterior grading, walkways, driveways, landscaping, and cleanup may also happen around this time.
A punch list identifies items that need correction before final acceptance. These may include paint touch-ups, cabinet adjustments, missing hardware, door alignment, fixture issues, damaged materials, or cleanup details. A thorough walkthrough helps catch small concerns before move-in.
Final inspections and occupancy approval close out the official construction process. Once approvals are complete and the builder’s handover is finished, you can move in knowing the main steps to make a house have been completed in the proper order.
Key takeaway
The house construction steps are easier to manage when you understand the sequence: plan, permit, prepare, build the structure, install systems, finish surfaces, inspect, and move in. Each stage affects the next, so thoughtful decisions early can prevent expensive changes later. Whether you are just researching what is the process of building a home or actively comparing builders, a clear step by step home building roadmap helps you ask better questions and make more confident choices.
Frequently asked questions
What are the steps of building a house?
The 12 steps are planning and design, permits, site preparation, foundation, framing, roofing and windows, rough-ins for plumbing, electrical and mechanical systems, inspections and insulation, drywall, exterior finishes and trim, interior finishes and a final punch list and inspection.
What is the first step in building a house?
Planning: settle on your goals, budget and design before permits and construction begin. Late changes get more expensive the further the build goes.
How long does it take to build a house?
Nationally, single-family homes completed in 2025 averaged 8.8 months from start to finish, and custom homes typically take about 9 to 10 months after you sign a contract. See how long new home construction takes.
What inspections happen during construction?
Inspections vary by jurisdiction, but typically cover the foundation and framing, rough-in plumbing, electrical and mechanical work before walls close, insulation and a final inspection before occupancy approval.
How can I avoid surprises when building a house?
Keep a written scope, photograph rough-ins before walls are closed and hold a contingency budget. Review change orders before approving them.
Keep reading: Custom home building process · How long new construction takes · Energy-efficient house design · The Copper Builders building process